
EEA Odontoidectomy
Preop
Know the course of the carotids, especially:
Where they run anterior to the C1 and C2 vertebral bodies. The carotids often course medially in this area and occasionally will come together or "kiss" anterior to C1. In the image below the carotids do "kiss" but at the level of the C2/3 disk space.
Pay attention to the inferior extent of the clivus and know whether you will have to take some clivus to facilitate the decompression.

Monitoring
SSEPs, BSERs, usually bilateral CN12 especially if there is some congenital fusion or bony assimilation
Medications
Dexamethasone 10 mg, Ancef
Positioning
Typical EEA positioning with the following exceptions:
- Place a bump lengthwise under the left shoulder
- Leave the head entirely neutral - no extension, rotation, or lateral tilt
Procedure
As for all EEAs, ENT will start, but there is significantly less for them to do in these cases so they will be ready for neurosurgery to scrub in within 20-30 minutes.
Posterior septostomy
Navigate along the nasal floor to the choana. Begin at the superior edge of the choana and draw a line anteriorly, angled down to the nasal floor. Draw a second line from the inferior edge of the choana along the nasal floor, to meet the first line at the anterior extent. This defines the septostomy.
Use the needle-tip Bovie to cut the mucosa along the red lines, then elevate with a cottle. Use a backbiter to bite away the outlined septostomy.
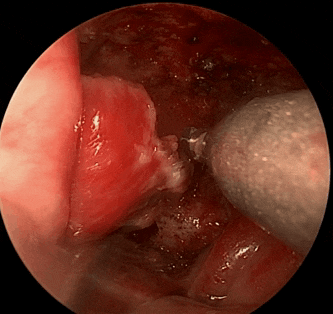
Right side


Left side


Maxillary crest drilling
The curved white line demarcates the edge of the posterior septostomy. The maxillary crest needs to be drilled down so you can reach low enough in the back.


Use image guidance to make sure you're low enough at the back of the field to reach the inferior aspect of the C1 anterior arch.
Run the drill from right to left over the stump of the maxillary crest to see if there is still a "hump" of crest that your instrument bumps over. If there is, you need to drill more.
Be careful with drilling lest you create a palatal fistula which is really bad.
Raising the retropharyngeal flap
The classic RP flap is an inverted "U" shape along the back of the retropharynx, demarcated as a white line. The arrows mark the location of the Eustachian tubes. The top of the RP flap is at the angle between the back of the retropharynx and the floor of the sphenoid sinus.
When the carotids are potentially at risk due to medial deviation, a "T" shaped incision is used instead.


In this case, we began intending to do a traditional "U" shaped incision, but changed course midway through in favor of the "T" shape.
The rectus capitis anterior, longus capitis and longus colli muscles are visible between the clivus and nasopharyngeal fascia.
The supracondylar groove is the bony landmark for the hypoglossal nerve on the ventral surface of the occipital bone. It is formed by the insertion of rectus capitis anterior.


Schematic demonstrating relevant anatomy. PS: rectus capitis anterior, longus colli and longus capitis muscles; OC: occipital condyle; D: dens; R: midline raphe; FM: foramen magnum.
From Kassam, Amin B., et al. "The expanded endonasal approach: a fully endoscopic transnasal approach and resection of the odontoid process: technical case report." Operative Neurosurgery 57.suppl_1 (2005): E213-E213.
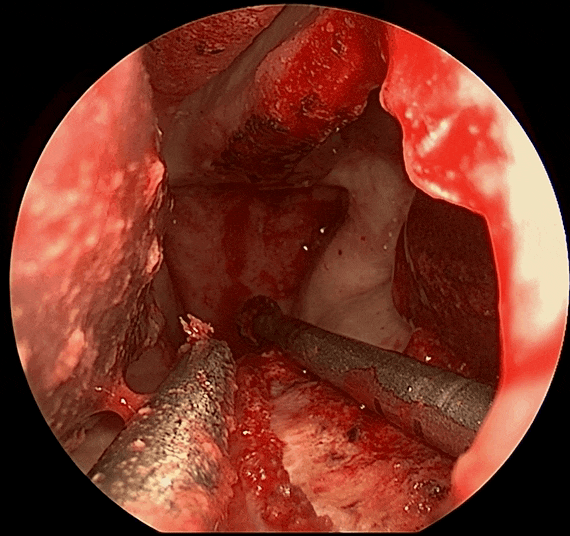
Drill the C1 anterior arch
Left arch. We started with a diamond bit and later transitioned to an M8.

Right arch.
Use a Kerrison and straight Thru-cut to cut the ligamentous attachments of the arch and remove it.
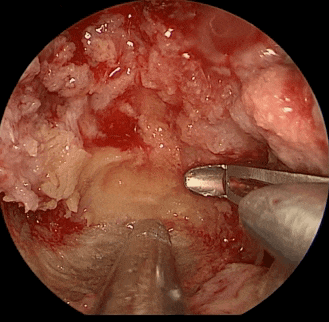
Odontoidectomy
Use a straight Thru-cut to bite away the ligamentous attachments and pannus overlying the odontoid.
Drill the odontoid from top to bottom.

Switch to a diamond bit again when you reach the posterior cortex of the odontoid. When it's thin, the posterior cortex will move when you push on it with the drill bit.

Use a Kerrison to remove the final piece of posterior cortex
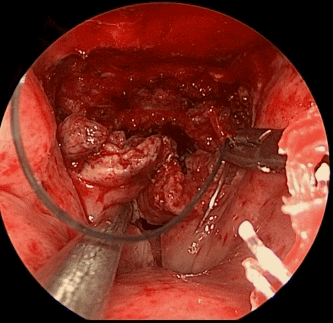
Pannus resection
Remove the pannus with Kerrisons and Thru-cuts
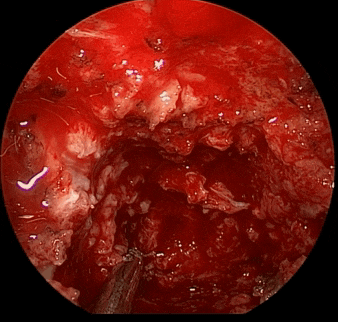
Usually, you will stop once you see pulsations in the tectorial membrane. In this case, the tectorial membrane was hypertrophic and compressive, so the resection was carried to the dura.

Closure
Use a 3-0 V-loc suture to close the descending limb of the RP flap. Start at the bottom and work up. ENT will usually pack with an absorbable packing like Posisept.
Orders
- EEA order set
- ICU admission
- Dexamethasone 4q6 for 24 hours
- CTA head and neck
Follow-up
Two weeks for a wound check, usually with AP and lateral x-rays, sometimes with an MRI c spine
Dr. Okonkwo will review images when the patient comes to Gardner's clinic but does not need to see the patient
Second visit is in 6 months with AP lateral c spine films with Okonkwo and in 1 year with MRI c spine with Gardner